
If you are looking for the fastest and easiest way of how to add texture in Photoshop, this tutorial is what you need. From time to time adding textural patterns or portrait background textures to photographs can make them pop and stylish. In this post, you will see and learn how to apply a wood texture to your photos in Photoshop CC in less than 10 minutes and 5 steps. The textures are an awesome resource for creative photographers, photo retouchers, creative designers who want to play around with different looks.
How to Add Wood Texture in Photoshop
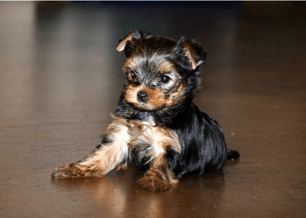
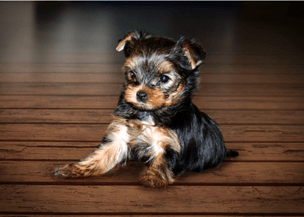
Image textures are basically a photo or an overlay that is added to a digital image on a background, object. The textures are usually applied using the Adobe Photoshop software. A wood texture background is usually used to enhance interior or exterior photos. If you want to make wooden things more vivid on the photos, add this texture in Photoshop. Modern or vintage wood photography textures are a perfect way out for photographers and real estate agents looking to get that rustic background look. Applying textures in Photoshop is a very easy process, so you don’t need to be an expert in photoshopping to make that.

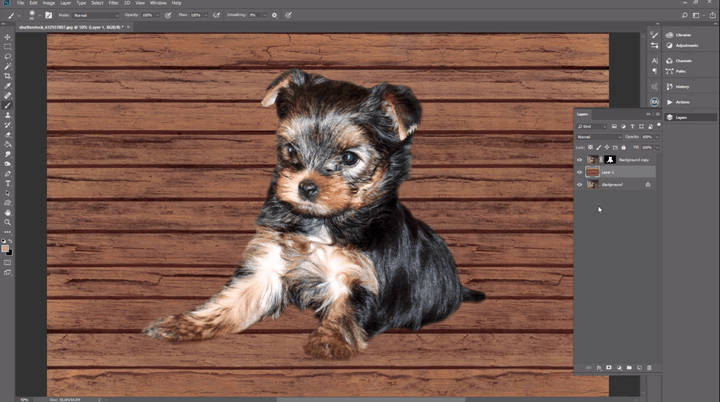
1 Step: Let’s open the photo you want to edit in Photoshop. Today, it’s a puppy on the floor. As you see, because of the flash, the floor is lit. It looks like a mirror and lost its colors and natural texture. Name the background layer “Background” (just double click on the background layer in the Layers panel to change the name). I prefer a size of 2048 px x 2048 px if I create a new texture photo, but the image size depends on your purposes. Then open the photo with a seamless wooden texture. Now copy and paste it into your original photo and name this new layer “Layer 1”. Check if the Layer 1 is above the Background layer as shown on the screen below. Resize your textures to match your main photograph.
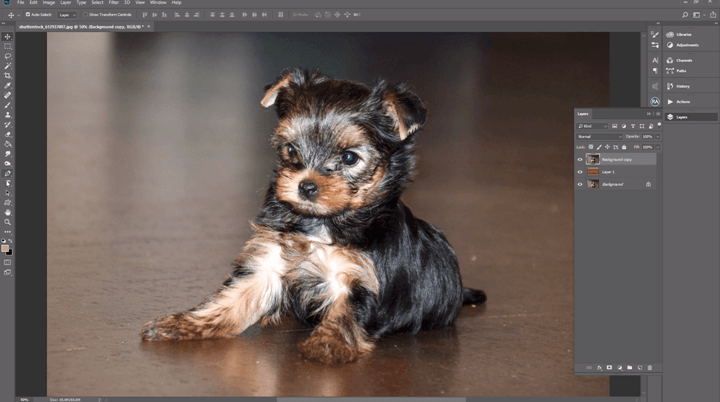
2 Step: Create the Background copy and paste it above all layers. Select the Pen Tool. It will let you draw straight segments and curves with great precision. Use the Shift + P key combination to cycle through the tools in the Pen group. We work with a standard Pen Tool. Cut out your object from the initial background.
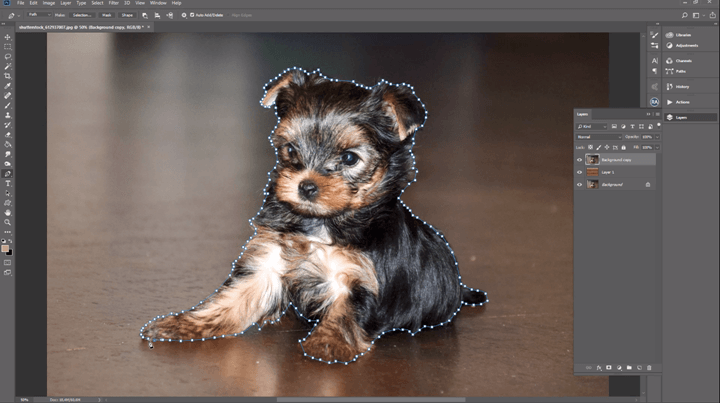
3 Step: Press “Make Selection”, the “Feather Radius” should be 1 pixel, and press “Alt”. Select a soft black brush (60 size) to make the edges softer and remove the defects of the cutting the object from the initial background.
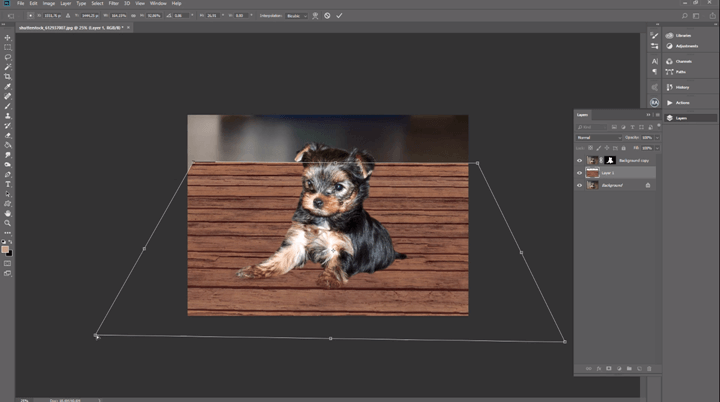
4 Step: Choose the texture’s position you need, then right-click and select Distort. Play with the Photoshop texture’s corners: you may change the perspective, size, and position to give a natural and realistic effect. Add a mask to the Background layer. Select a black brush and remove the texture you don’t need.
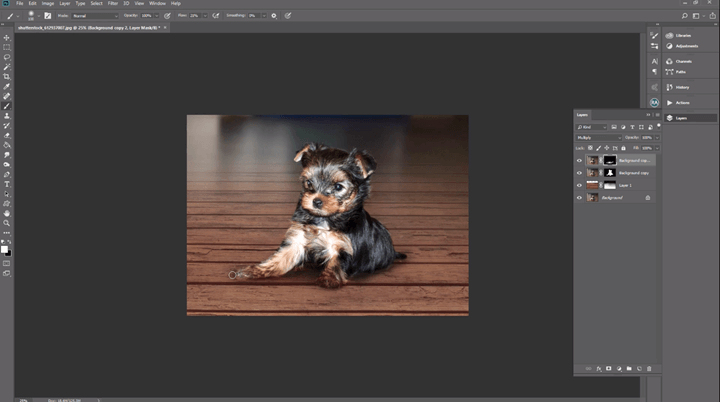
5 Step: If you still find your photo unnatural, duplicate the initial Background layer, put a mask on it, and draw a natural shadow with a white brush. I think this example shows the power of Adobe Photoshop if you want to create realistic textures even without or with damaged initial photo material.
Recommendation:
Select the texture photo that is bigger in size than your original photo. It will help you change the size of the texture as you need and not damage its quality.
Other Photoshop Textures
See other examples of applying grunge, leather, glitter, and concrete Photoshop textures. They are designed to impress clients and make photo editing simpler for photographers or photo retouchers. These Photoshop plug-ins add character and balance to your images in several clicks. Easily layer in lightning, snow, lens flare, rain, grunge, paper, watercolor, paint, grass, fabric, stripes, marble, brick wall, gold, rainbow, leather, glitter, and so much more. You can use Photoshop textures for all Adobe Ps versions, change their sizes to fit all photos. Downloading and using Photoshop Textures in photography makes it richer, adding an actual feel to your works. Therefore, if you are looking for some really cool patterns and textures for your photographs, view the following before and after examples.
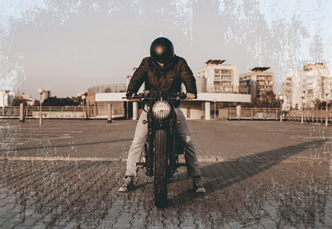
Grunge photos are usually taken to provoke a dimension of frightening and powerful emotions. This kind of photographs is deeply retouched to achieve this dark, dirty, old, and gloomy effect. Highly recommended to apply the grunge texture background to dramatic portraits, extreme sports photography, magnificent landscapes or surreal photo compositions. Therefore, whether you want to give your pictures an old-fashioned look or a surreal, abstract effect, these Ps textures will be very useful.
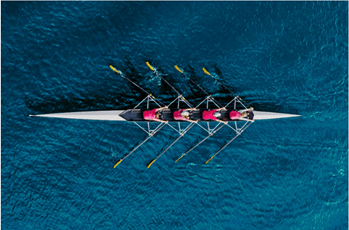
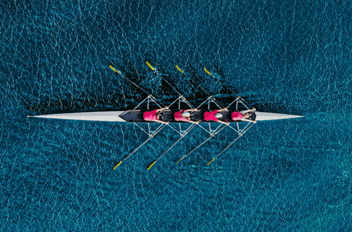
This Photoshop texture is usually used for architectural visualizations where you need to show high quality furniture textures. The leather background is recommended to apply to interior photos to enhance furniture photography, make clothes look better on portrait photos or make ocean/river/sea photographs dramatic and active.

If you want your models to be fancier, or invitations look brighter, here’s your chance. The glitter Photoshop textures are recommended to apply to add a magical touch to the event, portrait, party, birthday, wedding, and baby images. These gorgeous glitter plug-ins will help you create the most glamorous style in every image. Usually, the glitter templates are made from photos of real glitter, so they are large-grain, real-looking, multicolored textures.


If a white background seems boring and you want to make it textured, choose the concrete Photoshop texture. Also, you may add it to the object, real estate, and street photos.
Summing up
Photoshop textures, overlays, patterns and backgrounds are very useful resources and can be used in so many ways by photographers, designers, and photo retouchers. There are never enough textures and having them on your laptop can save you a lot of time. So always keep several texture collections because you never know when you will need a certain texture to make your photos bright and pop.